My first post in about a month, and it’s all about paper (the pretty scrapbook-ish kind of paper!)
I should really be far craftier than I am.
It’s true. I love yarn. I love painting stuff. I love making things pretty (oh how I love making things pretty!) And, most of all, I love (love!) scrapbook paper.
You know that aisle in Michaels with all the pretty, perfectly stacked piles of colourful papers? I get lost in that aisle for hours and hours. HOURS. Combining different patterns. Swooning over prints. Marvelling over all of the potential for serious prettiness. Yep. It’s really rather silly considering I’m in no way a scrapbooker (since, honestly, I’m far too lazy for what appears to be a very finicky and fussy – albeit lovely! – hobby) and since (as previously noted) I’m not particularly crafty.
During my most recent trip to Michaels I picked up no fewer than fourteen (yup – fourteen) (see? I’m obsessed…) sheets of gorgeous paper. Did I have any particular plan for all these beautiful papers? Nope. I just really liked them. I also bought a few super inexpensive (they were three whole bucks each, I think) ready-to-paint (or ready-to-leave-in-their-lovely-unpainted-state, in my case) picture frames. And then I came home and started looking at the fireplace mantel in my dining room.
(Aside: I find it important to clarify that this particular faux fireplace mantel is located in my dining room, since we have no fewer than three faux fireplaces in this house. The previous home owners were indeed faux fireplace fanatics.)
And then the wheels started turning. And then I realized that the sheets of lovely coordinating scrapbook paper, and those unpainted frames might look sorta rustic-ish-ly cute on my dining room fireplace mantel.
And so began the rearranging. (Does anyone else get a little OCD when it comes to fireplace mantel decorating?) And the fussing. And the tweaking.
And here is what I finally came up with…
It’s not done yet. It needs something… more. Perhaps a few miniature pumpkins in honour of fall. Or some Christmassy bobbles and doodads (but not for a few weeks – I adore Christmas, but it’s a little too early for that at the moment, even for me!) For now, and until I get around to adding additional adornments to the mantel, those lovely papers are making me happy.
That all said, there will be more faux fireplace fussing to follow, I’m sure. And definitely more frivolous scrapbook paper purchases made in the not-at-all distant future. (I just can’t get enough!) (It’s weird, I know.)
Leave a comment
Pink polka dotted placemat perfection (alternative title: a little table linen love)
Hello! Please humour me while I get irrationally excited about something really rather insignificant for a minute, k?
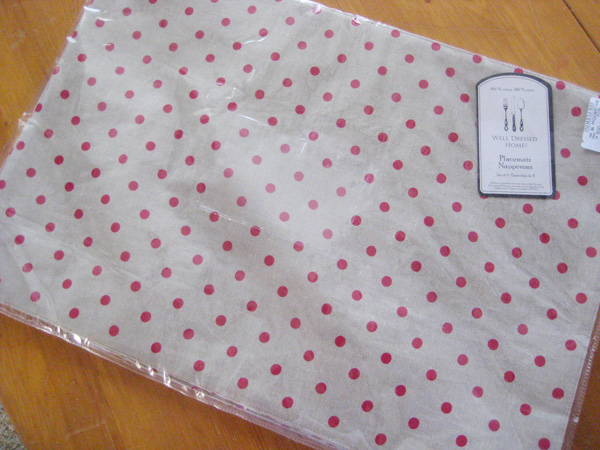
I bought new placemats for our dining room table yesterday. Yay! They were a HomeSense buy (and not at all what I went into the store looking for) and I looooove them. Love them! They’re adorable and dotty and pretty and perfect.
See?
Pink polka-dotted perfection, if you ask me. :)
If we didn’t constantly leave our placemats sitting out, this would, of course, be a non-issue. But, truthfully, I’m lazy. The placemats stay out because we use them all the time. So why bother putting them away? That’d just be an extra (albeit, two second) step added to my day. And, with baby stuff looming and last minute renovations on the horizon, that extra two seconds is precious, precious time, if you ask me.
Plus, when you have placemats this pretty, why stash them away? :)
(Is it normal to get this excited about placemats? Likely not. But I’m excited nonetheless!)
They’ll look even better once the walls are de-greened. Until this de-greening takes place, however, I’ve decided to completely ignore the green. Kinda like when there’s a bee following you around, and someone (inevitably) says “Ignore it and it’ll just fly away.” (Which, by the way, never seems like particularly good advice. I’ve ignored many bees in my lifetime. Few have flown away just because I’m not giving them enough attention. In fact, I think they thrive on indifference. I personally prefer – and often employ – the run-screaming-with-wildly-flailing-arms method for ridding myself of random flying insects.) Similarly, I’m hoping that if I show enough disinterest in my walls’ blatant attempts to irritate me with their overt green-ness, I’ll blink one day and – poof! – they’ll have fluttered away to wherever bad paint colours go. With or without screaming and arm-flailing.
But I digress…
Yay! Pink polka dots!
Leave a comment
Doing the drapery dance (which doesn’t at all look like the Safety Dance) (ok, it actually kinda does, but just a little)
It’s spring! Well, sort of. I’m still wearing a winter coat on some mornings (albeit a very tight one due to my ever-growing and beloved baby bump.) And I’m keeping my toque and mitts and scarf close at hand. Just in case the weather turns wintery. Again. Since, you know, Mother Nature has cursed us with a never ending winter this year. (Dear Mother Nature… I love you, and you’re awesome, but you’re being completely irrational this year. Stop it. Please. Thank you!)
And while I despise the ridiculously cold snowy winter we’ve had this year, I despise my current window coverings even more. The previous home owners (being the insane awesome people that they are!) left us a plethora of flood-ready bright white sparkly-swirl sheers for our windows. An intended act of generosity? Perhaps. But regardless of motive, the result is the same: the curtains are making me a crazy person.
Enter: Ikea. Yep. My beloved and dependable go-to for window coverings. Their curtains are cheap. They’re very cheerful. They come in really long lengths (for those of us who prefer to set our curtain rods a tad higher than the average population.) And their curtains come in pairs (which seems to be a bit of a rarity anymore.) (But really, how many people only need one curtain?) (Cough, cough, rip off, ehem…) During an Ikea trip about a month ago I purchased no fewer than six (much needed) new drapery sets along with the accompanying curtain rods and hardware and doodads and such. After a second Ikea trip a few days later (because a certain someone with a wee bit of baby brain forgot a few crucial curtain rod components…) we finally got everything up last weekend.
Here’s my front living room window before (with its icky swirly silver sheers all aglow):
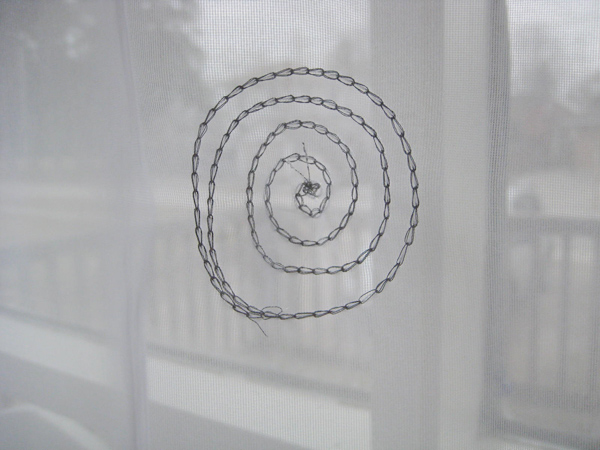
(Here’s a closeup of the sheers’ sparkly swirls, just in case you’re interested. Snazzy, eh?)
And here’s the after, featuring my all-time favourite front window drapes (Ikea’s Ritva) and a set of soft-ivory sheers (Ikea’s Teresia).
I’m a happy girl! But why did we get another pair of sheers? The glass panes in this window are no longer sealed properly (one of the hazards of buying a fixer-upper with archaic windows) so there’s condensation and dust between the panes and this window always appears dirty from the street (despite that – I promise! – it’s very very clean!) The sheers help mask that a bit, which means we’ll likely be sheer-people until we replace that entire front window (which, sadly, will be a very expensive venture) (which, also sadly, means it’s pretty far down on our list of priorities right now.)
The Ritvas are waaay too long right now (I’m all for little drapery puddles, but this is a little silly) and will likely require shortening. Tip I’ve learned? Wash and dry Ikea drapes a couple of times before shortening them. They sometimes shrink. A lot. Whenever they’ve accumulated enough kitty fur to require a trip through the laundry (which, sadly, will likely be soon) I’ll get around to making them a bit shorter. For now, however, I’m just happy that they’re not sparkly. Or swirly. Or bright white.
Next up? Here’s the before of my dining room window…
Apparently the previous owners weren’t bothered by the too-short panels (or, um, lack of baseboards) but I think the windows look much lovelier now that they’re dressed with a few Borghild panels from Ikea…
And we added the same curtains to this previously un-adorned window at the end of our dining room too. Here it is pre-curtaining…
…and here’s the much improved after…
All of which makes me a very happy girl. :)
The last set of the six sets of curtains I purchased is earmarked for the baby’s room (should we ever get around to starting the nursery) (hello? Ambition? You should probably kick in about now…) If they don’t end up used in the nursery, we’ll hang them in our bedroom (since a certain black kitten has pretty much destroyed our bedroom drapes.) (He thinks bedroom curtain-clawing is a really fun pastime.) (Particularly at 5am.) (It’s a good thing he’s cute.)
And now, for your viewing pleasure (and a little post-title clarity), here’s a little Drapery Safety Dance from Men Without Hats…
…because, well, it’s really, really weird, but so fun. :)
Leave a comment
A happy hardwood discovery (and a sad tale of forgotten hardware)
This post was supposed to be a rather celebratory “the evil white sheers are gone!” sort of post about my new drapes. My six (six!) packages of wonderful, lovely, much-adored, space-transforming new drapes, to be exact. However sometimes things don’t quite work out as planned. Like, for instance, when you buy all the hardware pieces needed to assemble a curtain rod for a big bay window, and you excitedly prepare to hang everything one sunny Sunday afternoon and then realize (dun dun dun) that you’ve forgotten a critical component way back at the store. Which, unfortunately, is 1.5 hours away.
Yep. That happened this weekend. I was so sad.
Luckily, I have another trip to Ikea planned for the not-so-distant future (since baby needs a dresser/change table for his or her little room, and handsome Hemnes seems to fit the bill) so we’ll pick up the remaining (and sadly missed) drapery hardware bits during that dresser-buying mission. In the meantime, however, my bay window looks rather naked. (Although the cats are pretty happy with the curtain-less and completely unobstructed view – cats don’t really understand, or care for, drapery.)
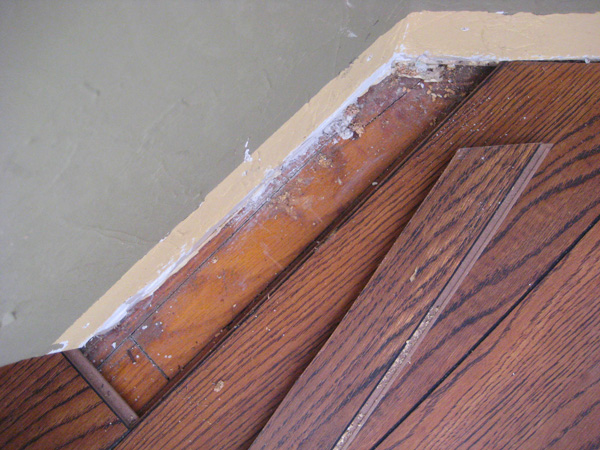
But the weekend wasn’t entirely filled with drapery doom and gloom! While staring (woefully) at my naked dining room windows, I noticed that a piece of our (quite shoddily installed) laminate flooring had at some point come loose.
So I gave it a wee wiggle. And it moved. And, in fact, it came completely out. And look (look!) what I found underneath…
Yep. That, there, is hardwood. Not original-to-the-house beautiful 100 year old wide-plank-holy-awesomeness-pine-or-mahogany-or-something-equally-amazing hardwood, of course, but hardwood nonetheless.
I did a little happy dance. In front of my naked big bay windows. At the exact same moment that my neighbour walked by with his dog, of course. (I’m pretty sure the neighbours think we’re a bit odd.)
So our newest question? How far does the flooring extend? Is there hardwood under all of the laminate flooring in our living room/dining room? Or only under part? With the house being quite old (and without knowing what the original floorplan here looked like) the laminate could very well be hiding big ugly scars from walls that were removed and additions that were additioned over the years. Afterall, why else would you cover hardwood flooring with laminate? If it’s simply scratched up, hardwood can be refinished. And I’m not at all afraid of a few scratches. We’ve had this sort of narrow-plank hardwood flooring in both of our previous homes, and age-related scratches and dings just add a little character (if you ask me.) They scream “This house was well-loved in past years by families blessed with excited children and lively dinner parties.” If we reveal an expanse of hardwood underneath the laminate, regardless of the shape it’s in, I’ll be one happy girl.
Now, the hard part. Finding the courage to start ripping all of the existing flooring up. It’s one of those jobs that once started, can’t be stopped. It’s also one of those jobs that’ll require a really quickly executed Plan B if it turns out that the flooring underneath isn’t usable for some reason.
Maybe we’ll save that for another (much braver) day. In the meantime, I’m leaving that one small piece of laminate flooring pulled up as a reminder that something really amazing could be hiding underneath all the ugliness. Afterall, it was that same hope of hidden beauty that convinced us to buy our old mauve house in the first place. :)
Leave a comment


