Yup. I’m one of those people.
So it’s hardly surprising, I suppose, that I just finished up the thank you cards for my baby shower (um, the one I attended BEFORE Patrick was born) (in July) (early July…) Embarrassing? Yes. But, in all honesty, the past few months have absolutely flown by. FLOWN! And – poof! – suddenly it was December. And I suddenly realized that Christmas cards needed to go out. And it seemed in poor taste (actually, downright tacky) to send Christmas cards out to the same people who first deserved thank yous for their very generous and wonderfully thoughtful baby shower gifts.
Which, given the (embarrassingly long) time that had passed between the shower and the thank yous, makes me really thankful that I took the time (during the early days of my maternity leave, pre-baby) to carefully record what everyone had given me. Like this…
Yup. I took pictures of all the gifts I was given, along with the accompanying cards. Clever? I thought so! And, if not clever, practical at least, since five months out I would have never, in a gazillion years, remembered what gifts I was given and by whom (despite being unbelievably thankful for all of the super generous gifts I received.) (Mommy-brain is a bit of a bitch like that.)
Plus I think it’s pretty neat to have pictures of all the gifts we were given. Yup. I’m all about preserving memories with my little guy. Every single memory. Every one. Even the tiniest. Mommy is a little OCD like that. (Although I prefer to call it “organized.”) Patrick is currently trying desperately to crawl, and I’m sure having the ability to run away from my camera makes mobility particularly appealing. (I have all of his crawling attempts videotaped, of course.)
So there. That’s my little piece of advice for any soon-to-be mommas out there who are headed to their baby showers shortly. Take pictures of your gifts. It’s actually quite a lovely keepsake! And, if you’re a bit tardy like me, it’ll be a huge help when you go to write your thank you cards. Several months later. :)
]]>
It’s true. I love yarn. I love painting stuff. I love making things pretty (oh how I love making things pretty!) And, most of all, I love (love!) scrapbook paper.
You know that aisle in Michaels with all the pretty, perfectly stacked piles of colourful papers? I get lost in that aisle for hours and hours. HOURS. Combining different patterns. Swooning over prints. Marvelling over all of the potential for serious prettiness. Yep. It’s really rather silly considering I’m in no way a scrapbooker (since, honestly, I’m far too lazy for what appears to be a very finicky and fussy – albeit lovely! – hobby) and since (as previously noted) I’m not particularly crafty.
During my most recent trip to Michaels I picked up no fewer than fourteen (yup – fourteen) (see? I’m obsessed…) sheets of gorgeous paper. Did I have any particular plan for all these beautiful papers? Nope. I just really liked them. I also bought a few super inexpensive (they were three whole bucks each, I think) ready-to-paint (or ready-to-leave-in-their-lovely-unpainted-state, in my case) picture frames. And then I came home and started looking at the fireplace mantel in my dining room.
(Aside: I find it important to clarify that this particular faux fireplace mantel is located in my dining room, since we have no fewer than three faux fireplaces in this house. The previous home owners were indeed faux fireplace fanatics.)
And then the wheels started turning. And then I realized that the sheets of lovely coordinating scrapbook paper, and those unpainted frames might look sorta rustic-ish-ly cute on my dining room fireplace mantel.
And so began the rearranging. (Does anyone else get a little OCD when it comes to fireplace mantel decorating?) And the fussing. And the tweaking.
And here is what I finally came up with…
It’s not done yet. It needs something… more. Perhaps a few miniature pumpkins in honour of fall. Or some Christmassy bobbles and doodads (but not for a few weeks – I adore Christmas, but it’s a little too early for that at the moment, even for me!) For now, and until I get around to adding additional adornments to the mantel, those lovely papers are making me happy.
That all said, there will be more faux fireplace fussing to follow, I’m sure. And definitely more frivolous scrapbook paper purchases made in the not-at-all distant future. (I just can’t get enough!) (It’s weird, I know.)
]]>
So, in short (or, rather, long): I feel like I’ve been super busy, despite my currently newborn-pending, work-free status.
Although I did manage to fit in a quick DIY mat session the other day. For the record, I’m really quite awful at using the tripod + timer approach to self-photography. This was a rather challenging little project! For about an hour’s effort, I ended up with one image worth sharing…
…and even then, it’s out of focus. And my hands are all gross and pregnancy-vein-y. And I’m not sure if I look serene and contemplative, or sort of annoyed. Needless to say, Sweetie is taking me out later this week to try again, with an actual person (Sweetie) on the other end of the lens. Guessing (and hoping!) that we’ll have much better results with a two-person DIY mat session approach. I’ll keep you posted!
The good (and rather timely) news: I’m nearly finished with the nursery (finally!), so a big (likely long-winded) update/grand reveal will be coming shortly. In the meantime, if you need me, I’ll probably be marveling at the size of my belly while hanging/organizing/baking/shopping for something. At 38 weeks, I’m starting to feel really large. But I also feel amazing. And with only a couple weeks left before my due date (and, really, knowing that Baby could arrive at any point now) I feel so lucky to be a mommy-to-be. Can’t wait to make that transition into simply being “mommy”.
]]>
The newest addition to our create curb appeal campaign? Pretty new house numbers.
I present to you Exhibit A: the old house numbers…
Brassy and rusted and old. Gross eh?
And, now, the snazzy new mailbox decal numerals (courtesy of etsy seller WelcomingWalls)…
I never imagined that a set of sticky little house number decals affixed to a plain black mailbox could make me so unbelievably happy.
And, just for comparison’s sake, let’s take a look at a couple of rather disturbing before pics, shall we? Here’s the picture from the original house listing…
…and here’s what the house looked like the day we took possession, with all the previous owners’ stuff strewn all over our newly acquired lawn…
Yep. We bought THAT house. We’re rather brave (or foolish?) peeps, Sweetie and me.
And now the after…
See? Progress. Slow progress, mind you (we still need to dig out that ugly stump in the front garden and plant some more appropriately sized cedars or boxwoods and – oh! – some flowers in those flowerbeds would look pretty and the shutters and front door could definitely use a lick of paint and that deck would really look far lovelier if it was stained and gee wouldn’t it be awesome if our entire house was re-sided in any colour except for mauve?)
But, still, progress nonetheless. :)
]]>But once we reached our comfort zone (shortly after our 12 week ultrasound showed that baby was perfect and squirmy and had a good strong heartbeat) we decided to finally tell the future grandparents.
Being a rather monumentous and life-changing announcement, this wasn’t something I wanted to simply blurt out over dinner, mid-french fry. I wanted the announcement to be as special as the news itself. Unfortunately, I’m not an overly creative person. And while Pinterest showed me hundreds of amazing and elaborate and creative announcements, none of them felt like us.
Here’s the card I finally designed to spread the news…
(Please don’t giggle too much at my obviously lacking graphic-design skills. A graphic-design guru I most certainly am not, and the whole thing was put together using – gasp! – Microsoft Word.)
We printed the card on basic cream-coloured card stock that I had left over from some other random DIY project, and then I tied a ribbon around the card (so that the card wouldn’t accidentally flop open and ruin the surprise before the recipient had a chance to finish reading the cover.)
When the time came to hand out the cards, there were happy tears from one set of grandparents, high-fives from another (who apparently had speculated, a couple weeks prior at Christmas, that something baby-related might be up), and stunned silence from the third set of future grandparents we told (which quickly erupted into squeals of joy.) All in all, the announcement (and this announcement method) was a huge success. :)
And now, several months later, all of the grandparents are eagerly anticipating the arrival of this new little one. Who is currently way bigger than a lime. In fact, I’m pretty sure I’ve got a happy little eggplant or butternut squash or watermelon rolling around in there now. (A really, really, cute one!)
]]>
Yeah. I’ve always hated that stuff.
My hatred harkens back to our first little house, a cute white-sided one-and-a-half storey starter house that had original 1950s windows (and a whole lot of draftiness) (and a ridiculous amount of wallpaper, as well as a salmon and green coloured kitchen, but that’s a whole other story.) As new home owners for the very first time, we enthusiastically plastic-ed the dickens out of those nasty drafty windows the first winter we lived in that house. And the house was indeed warmer and far cozier than it would have been otherwise. We were proud in our house-warming triumph, and praised ourselves for being awesome first-time home owners.
Yep. We’d quite obviously nailed the whole winterizing thing.
But then spring hit. And we started pulling the plastic film and tape off of the windows so that we could once again open our windows and enjoy the fresh air. And we sadly realized that the tape we’d carefully placed around each of our windows on my freshly painted window trim, while fantastic in sealing out the much-dreaded window drafts, was taking off a strip of paint in its wake. And I was sad. I was so sad. I sanded and repainted the trim around every single window in our house that spring. And I swore to never again employ the plastic-film method for weatherproofing a house.
But then we met the old mauve house.
Fast forward ten years (if this was a TV show, some bizarre fast-moving montage of random images from the last decade would have just flashed across your screen) and we are once again in a house with very drafty windows. Some of our windows are really old (at least one is original to the house, dating it at about 100 years old – the glass is all wave-y and distorted and, in truth, I think it’s pretty neat), some are new-er but installed very very poorly (like most things around our beloved old house), and all of them are drafty. So drafty. And, as we stand in the midst of one of the coldest winters I can remember in recent history, I’m caving.
Bring on the plastic film.
Yep. I’m throwing my hands up in defeat and admitting that until this house either has new windows or far better insulation (or, ideally, both) we are going to be a window-filming family. With the recent insanely cold nights and not-much-warmer days, our house has been uncomfortably cold despite that the furnace has been running non-stop, and I’m dreading (oh, so dreading!) our next gas bill. It’s not at all pretty.
This week’s project: weatherproofing the windows with a ginormous roll of cling-wrap-like plastic film and specially formulated “non-marring” double sided tape.
And if you need to find me next spring, I’ll likely be repainting all of our windows. (Sigh.)
]]>
Yeah. We had one of those in our kitchen. For three long months.
Here’s what we started with…
See the mish-mash of random wires hanging from the cabinets on the right? Let’s look closer…
Ew. Yep. That, apparently, was someone’s (ill-considered) plan for under cabinet lighting. And that has been driving me crazy since the day we moved into this house. And yet, I’d become somewhat (insanely) immune to the wire-y mess.
I finally came to my senses over the holidays and realized that enough was enough. Because, really, would YOU plug all that in? Nope. Me neither. So I summoned Sweetie. And Sweetie started pulling. And it all came down in one fell swoop. All in all, the random-and-ugly-under-cabinet-lighting-removal project took 60 seconds. Maybe. Probably less. (Plus a few minutes during which I gathered up all the nails and such that went flying when Sweetie started his under cabinet lighting destruction.)
And see? All pretty now. :)
(Well sorta. I still have cabinets to paint. And walls to paint. And countertops to swap. And a floor to take up. And that beige plastic sink should really go away too.)
But at least I’m random kitchen wire free. Baby steps. :)
]]>
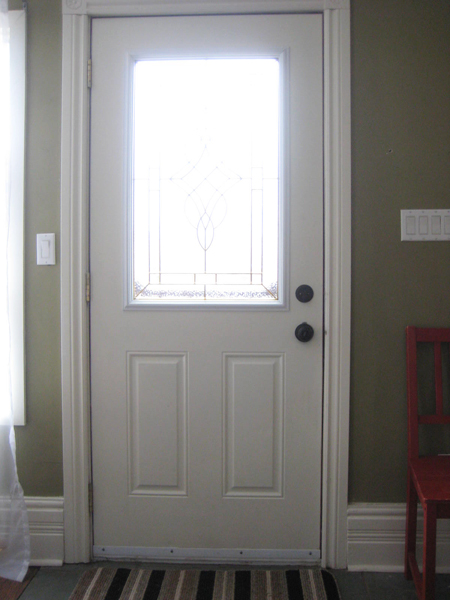
However, this was all sorta ok with me. The gross truth? Our old door hardware was gold. And not nice, brushed, fancy-pants, classy-looking gold. Nope. It was shiny, bright yellow, rather unconvincing (and exceedingly obnoxious) gold.
And, at some point, somehow, the set had become really bashed up.
I know why the previous owners had chosen gold: the decorative insert window-thingy (pretty sure that’s the technical term) in our front door is gold. So matching gold with more gold is indeed the obvious (albeit ugly) solution.
However, I’m not a huge fan of gold. (I KNOW. Gold everything is coming back. I’m resisting.) And I knew there must be another match out there. Something that would still look ok with the gold-laced door insert, without being so… 14-carat-ish.
Here is our non-gold, oil rubbed bronze, lovely-looking brand spanking new door set…
Pretty, eh? It’s such a small change, but I think it makes a huge difference.
(Although the door could really use a coat of paint.) (And, well, the trim too…)
(And the door’s exterior will one day [ie: as soon as door painting weather returns] be way less red.)
(And the street numbers are overdue for a desperately needed de-goldification too…)
But am I happy? OUI. So happy! I did a little celebratory happy dance in my living room when Sweetie had everything installed and called me in to inspect, in fact. And I now want to change all of our obnoxious gold doorknobs (sadly, we’ve inherited quite a few) to this lovely dark ORB colour. Could be a bit costly (sadly, door hardware is a little ridiculous!) but it will look amazing. :)
Dear Santa: for Christmas I’d like doorknobs. Lots and lots of doorknobs.
Weird. But true. :)
]]>
It’s not pretty.
We installed our new laminate countertop last weekend. It was a rather traumatic endeavor. Don’t worry – Sweetie and I are ok, we’re still married, and we still have all of our fingers and toes. But my kitchen?
Sigh.
Let’s start from the beginning, k?
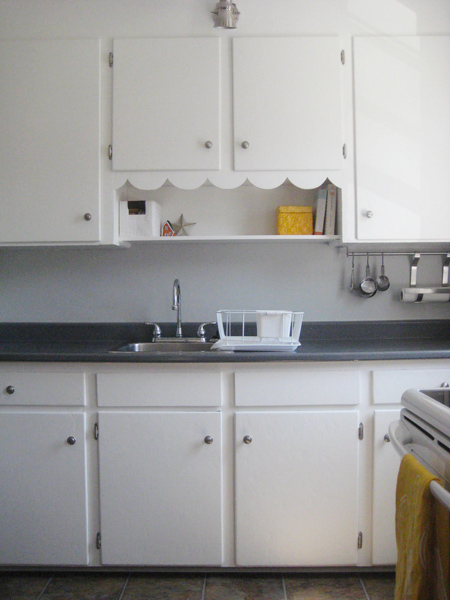
Here’s the before…
And look…
Yep! That’s my dish rack. Bet you’ve never seen that in any of my kitchen pics eh? That’s because I normally hide it away before taking any pictures of my kitchen. Nothing screams “Look! We have a single sink and no dishwasher!” like a big ol’ white dish rack. But because I was documenting our final single-sink day, I thought I’d leave the dish rack sitting out. Just once. :)
As soon as I was done snapping some final BEFORE pics (because I’m a little insane like that) Sweetie started tearing things apart while I ran out to Home Depot (for the third time in 24 hours) for yet another somethingmerother that we needed. When I returned, the old countertop was gone, and the kitchen looked like this…
Ack eh? Ack indeed.
We then grabbed the new slab of countertop. It seemed like a pretty simple concept: remove old countertop, add new countertop, enjoy new countertop. Unfortunately, despite some very careful measuring and re-measuring pre-new-countertop order, the new top didn’t fit. At all. We wiggled it, we tried turning it, we attempted some fancy coordinated countertop maneuvering. It was a definite no-go. Our mistake: little 1940s houses don’t have square walls. They also have window ledges that I’m convinced were specifically installed to thwart countertop replacement projects.
So out came the circular saw.
We employed the less-is-more strategy with the saw (since despite having the power to easily make the countertop shorter, it’d be super a fancy trick to make it longer again if we took too much off.) Cut number one was still too long. Cut number two was closer. And with each cut we’d haul the slab of laminate through the house into the back yard, then lug the ever so slightly shorter slab back in, all the while trying desperately not to chip the corners and edges.
Then came cut number three. It fit! But it fit a little too well.
(Those are my snazzy zebra print slippers btw. Cute eh? They were part of a Christmas gift basket from my very lovely and amazing friend Jess who blogs over at Little Townhome Love. And, coincidentally, whose birthday is today! HAPPY BIRTHDAY JESS! Love you!) (And our walls, for the record, are not purple. All that purple-ishness is likely reflecting off of my very pink hoodie.) (Note to self: always remove pink hoodie before taking pictures for blog.)
(But I digress…)
Yep. Once we finally cut enough off to fit the countertop into place beyond the evil too-long window ledge and the stubborn 1940s-carpentry-gone-awry bowed out wall, I was left with a ginormous gap at the most often used and most easily viewed end of the countertop.
I cried. It’s true.
So out came Sweetie’s belt sander.
You see, we couldn’t just leave it like this. There was no way to fill in that gap with caulking (my normal go-to fix-all solution.) So Sweetie decided that we’d sand down the high spot on the countertop to make it fit more flush with the bowed out wall. This meant that the gap on the other side would get even larger, but the other side of the countertop, being the less often used and less obvious side, could handle it.
The risk paid off. Hooray for power tools. Hooray for Sweetie. :)
A full day of plumbing fun followed. I’ll spare you the grizzly details. There was swearing and cursing and a whole lot of water coming from places it should not. Suffice it to say that Sweetie is definitely an electrician – a plumber he will never be. The Coles Notes visual version looks like this…
Irwin even got a bit of a plumbing lesson. For the record, cats sorta suck at plumbing.
But, after everything was cleaned up and sealed and leak-tested and shined up, we had this…
Pretty eh? New countertop. New double sink. Who needs a dish rack? For the first time in two and a half years, not me. :)
I still have a gazillion touch ups to do (we took some rather good-sized chunks out of the wall while trying to wiggle the new countertop into place, and the old countertop definitely sat lower than this one so I’ve got to do a bit of painting above the backsplash.) Oh, and see that big hole under the sink?
That’s where we had a bit of an oopsie with a big drill bit (patching definitely required there too.) And a cabinet door randomly fell off at some point during this whole experiment…
…so that should probably go back on eventually too.
But the countertop is in! Yay! And it’s awesome. And I’m a very happy girl.
The moral of this tale? Unless you’re a skilled carpenter, have walls that are perfectly square, or are just really really lucky when it comes to these sorts of DIY things, hire someone for countertop replacement. Really. I didn’t at all enjoy this project, and I’m still not 100% thrilled with the end result. But it’s done. And hopefully prospective home buyers just won’t look too closely at our workmanship.
And they all lived happily ever after. The end. Ish. :)
]]>
DONE.
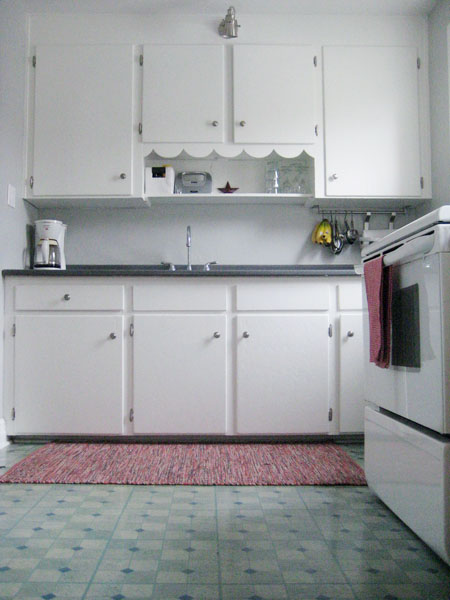
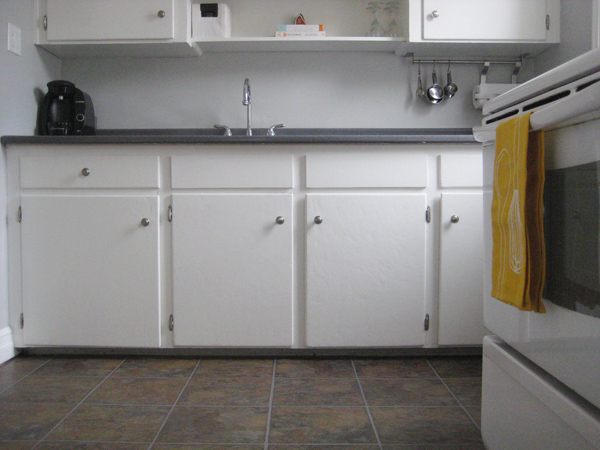
Here’s the progression (for anyone who’s visual, like me.)
I started with this…
…which (thankfully!) turned into this…
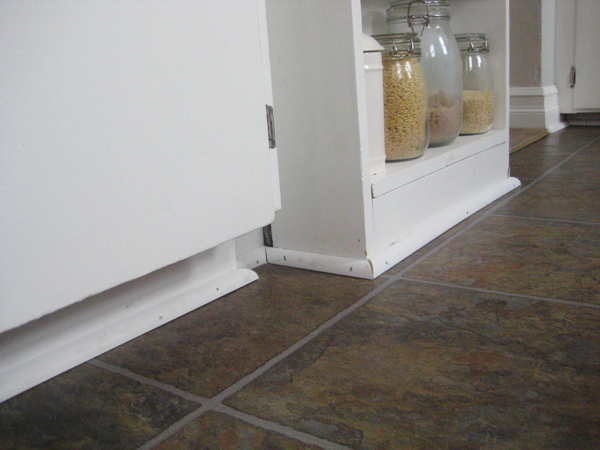
…Sweetie then added quarter round, which looked like this…
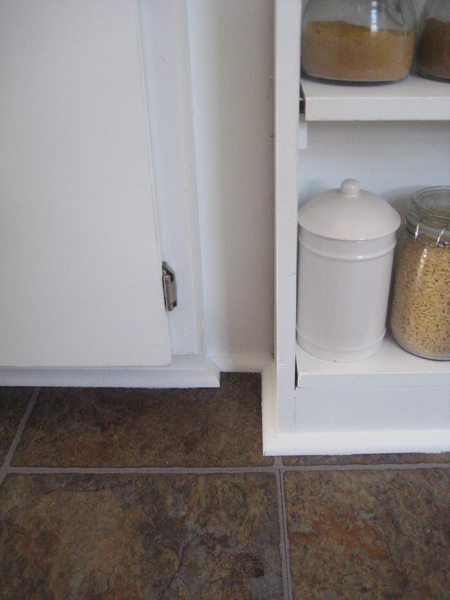
…then I caulked and painted everything, leaving a sparkly new (and finished) (and not blue) kitchen floor, that looks like this…
Am I happy much? YES. Have a already christened my new floor with a silly little happy dance? Of course. Does this occasion call for a big bottle of wine? Absolutely.
(Although pretty much any occasion is a good excuse for wine, if you ask me.)
One more thing done off our big ol’ to-do pre-listing list. And one major item completed from the list of things I’ve been meaning to do since we moved into this humble little abode 2.5 years ago.
Progress, how ever slow, is still progress. :)
]]>


