Winter window worries (the old mauve house is a rather drafty house)
You know that plastic weatherproofing film that you can get for your windows in winter? You know, the giant cling-wrap-like stuff that you stick in sheets across your windows, securing it to your window frames with “special non-marring” double sided tape? The type that’s supposed to keep your house warmer in the winter by adding another layer of insulating air between the outside world and the inner climate of your humble abode?
Yeah. I’ve always hated that stuff.
My hatred harkens back to our first little house, a cute white-sided one-and-a-half storey starter house that had original 1950s windows (and a whole lot of draftiness) (and a ridiculous amount of wallpaper, as well as a salmon and green coloured kitchen, but that’s a whole other story.) As new home owners for the very first time, we enthusiastically plastic-ed the dickens out of those nasty drafty windows the first winter we lived in that house. And the house was indeed warmer and far cozier than it would have been otherwise. We were proud in our house-warming triumph, and praised ourselves for being awesome first-time home owners.
Yep. We’d quite obviously nailed the whole winterizing thing.
But then spring hit. And we started pulling the plastic film and tape off of the windows so that we could once again open our windows and enjoy the fresh air. And we sadly realized that the tape we’d carefully placed around each of our windows on my freshly painted window trim, while fantastic in sealing out the much-dreaded window drafts, was taking off a strip of paint in its wake. And I was sad. I was so sad. I sanded and repainted the trim around every single window in our house that spring. And I swore to never again employ the plastic-film method for weatherproofing a house.
But then we met the old mauve house.
Fast forward ten years (if this was a TV show, some bizarre fast-moving montage of random images from the last decade would have just flashed across your screen) and we are once again in a house with very drafty windows. Some of our windows are really old (at least one is original to the house, dating it at about 100 years old – the glass is all wave-y and distorted and, in truth, I think it’s pretty neat), some are new-er but installed very very poorly (like most things around our beloved old house), and all of them are drafty. So drafty. And, as we stand in the midst of one of the coldest winters I can remember in recent history, I’m caving.
Bring on the plastic film.
Yep. I’m throwing my hands up in defeat and admitting that until this house either has new windows or far better insulation (or, ideally, both) we are going to be a window-filming family. With the recent insanely cold nights and not-much-warmer days, our house has been uncomfortably cold despite that the furnace has been running non-stop, and I’m dreading (oh, so dreading!) our next gas bill. It’s not at all pretty.
This week’s project: weatherproofing the windows with a ginormous roll of cling-wrap-like plastic film and specially formulated “non-marring” double sided tape.
And if you need to find me next spring, I’ll likely be repainting all of our windows. (Sigh.)
Leave a comment
The five minute project (that was three months overdue)
You know those little annoyances? You know, the type that totally gets under your skin and drives you a tad bonkers? But then, over time, you become a bit desensitized and the aforementioned sneaky little annoying annoyance somehow seamlessly becomes part of your life?
Yeah. We had one of those in our kitchen. For three long months.
Here’s what we started with…
See the mish-mash of random wires hanging from the cabinets on the right? Let’s look closer…
Ew. Yep. That, apparently, was someone’s (ill-considered) plan for under cabinet lighting. And that has been driving me crazy since the day we moved into this house. And yet, I’d become somewhat (insanely) immune to the wire-y mess.
I finally came to my senses over the holidays and realized that enough was enough. Because, really, would YOU plug all that in? Nope. Me neither. So I summoned Sweetie. And Sweetie started pulling. And it all came down in one fell swoop. All in all, the random-and-ugly-under-cabinet-lighting-removal project took 60 seconds. Maybe. Probably less. (Plus a few minutes during which I gathered up all the nails and such that went flying when Sweetie started his under cabinet lighting destruction.)
And see? All pretty now. :)
(Well sorta. I still have cabinets to paint. And walls to paint. And countertops to swap. And a floor to take up. And that beige plastic sink should really go away too.)
But at least I’m random kitchen wire free. Baby steps. :)
Leave a comment
Our lovely new lock (and delightful new door knob)
Sometime last week the door handle on our front door tragically stopped working. It wasn’t entirely a surprise. We’d been having problems with it on and off since moving to this house a couple months ago, but last week: it full-out broke. Bit the dust. Went swimming with the fishes. Which, in turn, made the act of getting into our house a wee bit challenging (and a whole lot frustrating.)
However, this was all sorta ok with me. The gross truth? Our old door hardware was gold. And not nice, brushed, fancy-pants, classy-looking gold. Nope. It was shiny, bright yellow, rather unconvincing (and exceedingly obnoxious) gold.
And, at some point, somehow, the set had become really bashed up.
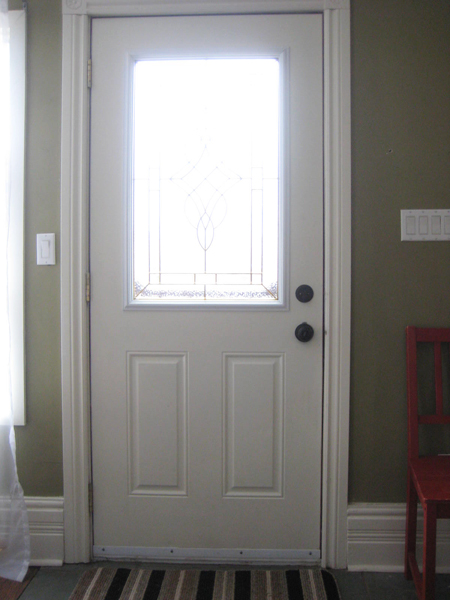
I know why the previous owners had chosen gold: the decorative insert window-thingy (pretty sure that’s the technical term) in our front door is gold. So matching gold with more gold is indeed the obvious (albeit ugly) solution.
However, I’m not a huge fan of gold. (I KNOW. Gold everything is coming back. I’m resisting.) And I knew there must be another match out there. Something that would still look ok with the gold-laced door insert, without being so… 14-carat-ish.
Here is our non-gold, oil rubbed bronze, lovely-looking brand spanking new door set…
Pretty, eh? It’s such a small change, but I think it makes a huge difference.
(Although the door could really use a coat of paint.) (And, well, the trim too…)
(And the door’s exterior will one day [ie: as soon as door painting weather returns] be way less red.)
(And the street numbers are overdue for a desperately needed de-goldification too…)
But am I happy? OUI. So happy! I did a little celebratory happy dance in my living room when Sweetie had everything installed and called me in to inspect, in fact. And I now want to change all of our obnoxious gold doorknobs (sadly, we’ve inherited quite a few) to this lovely dark ORB colour. Could be a bit costly (sadly, door hardware is a little ridiculous!) but it will look amazing. :)
Dear Santa: for Christmas I’d like doorknobs. Lots and lots of doorknobs.
Weird. But true. :)
Leave a comment
A short-ish tale about an ill-fated kitchen counter replacement project (spoiler alert: they all lived happily ever after) (more or less)
Hi. My name is Melissa, and I suck at carpentry. Give me a paintbrush? I’ll rock those walls. Hand me a ginormous piece of countertop and tell me to make it fit between two kitchen walls (while somehow bypassing a rather stupidly-placed windowsill?) I go a little batty. And cry a bit. And curse a lot.
It’s not pretty.
We installed our new laminate countertop last weekend. It was a rather traumatic endeavor. Don’t worry – Sweetie and I are ok, we’re still married, and we still have all of our fingers and toes. But my kitchen?
Sigh.
Let’s start from the beginning, k?
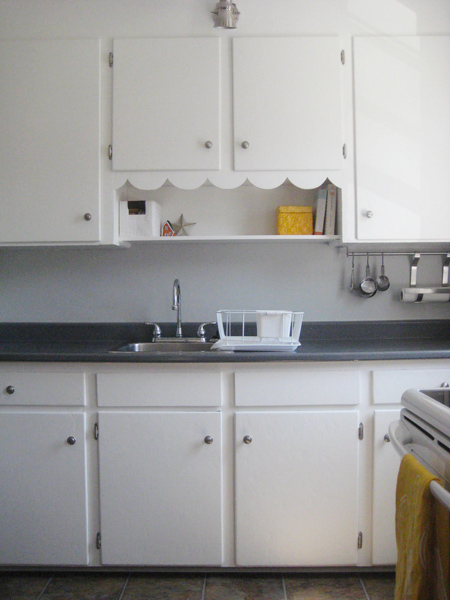
Here’s the before…
And look…
Yep! That’s my dish rack. Bet you’ve never seen that in any of my kitchen pics eh? That’s because I normally hide it away before taking any pictures of my kitchen. Nothing screams “Look! We have a single sink and no dishwasher!” like a big ol’ white dish rack. But because I was documenting our final single-sink day, I thought I’d leave the dish rack sitting out. Just once. :)
As soon as I was done snapping some final BEFORE pics (because I’m a little insane like that) Sweetie started tearing things apart while I ran out to Home Depot (for the third time in 24 hours) for yet another somethingmerother that we needed. When I returned, the old countertop was gone, and the kitchen looked like this…
Ack eh? Ack indeed.
We then grabbed the new slab of countertop. It seemed like a pretty simple concept: remove old countertop, add new countertop, enjoy new countertop. Unfortunately, despite some very careful measuring and re-measuring pre-new-countertop order, the new top didn’t fit. At all. We wiggled it, we tried turning it, we attempted some fancy coordinated countertop maneuvering. It was a definite no-go. Our mistake: little 1940s houses don’t have square walls. They also have window ledges that I’m convinced were specifically installed to thwart countertop replacement projects.
So out came the circular saw.
We employed the less-is-more strategy with the saw (since despite having the power to easily make the countertop shorter, it’d be super a fancy trick to make it longer again if we took too much off.) Cut number one was still too long. Cut number two was closer. And with each cut we’d haul the slab of laminate through the house into the back yard, then lug the ever so slightly shorter slab back in, all the while trying desperately not to chip the corners and edges.
Then came cut number three. It fit! But it fit a little too well.
(Those are my snazzy zebra print slippers btw. Cute eh? They were part of a Christmas gift basket from my very lovely and amazing friend Jess who blogs over at Little Townhome Love. And, coincidentally, whose birthday is today! HAPPY BIRTHDAY JESS! Love you!) (And our walls, for the record, are not purple. All that purple-ishness is likely reflecting off of my very pink hoodie.) (Note to self: always remove pink hoodie before taking pictures for blog.)
(But I digress…)
Yep. Once we finally cut enough off to fit the countertop into place beyond the evil too-long window ledge and the stubborn 1940s-carpentry-gone-awry bowed out wall, I was left with a ginormous gap at the most often used and most easily viewed end of the countertop.
I cried. It’s true.
So out came Sweetie’s belt sander.
You see, we couldn’t just leave it like this. There was no way to fill in that gap with caulking (my normal go-to fix-all solution.) So Sweetie decided that we’d sand down the high spot on the countertop to make it fit more flush with the bowed out wall. This meant that the gap on the other side would get even larger, but the other side of the countertop, being the less often used and less obvious side, could handle it.
The risk paid off. Hooray for power tools. Hooray for Sweetie. :)
A full day of plumbing fun followed. I’ll spare you the grizzly details. There was swearing and cursing and a whole lot of water coming from places it should not. Suffice it to say that Sweetie is definitely an electrician – a plumber he will never be. The Coles Notes visual version looks like this…
Irwin even got a bit of a plumbing lesson. For the record, cats sorta suck at plumbing.
But, after everything was cleaned up and sealed and leak-tested and shined up, we had this…
Pretty eh? New countertop. New double sink. Who needs a dish rack? For the first time in two and a half years, not me. :)
I still have a gazillion touch ups to do (we took some rather good-sized chunks out of the wall while trying to wiggle the new countertop into place, and the old countertop definitely sat lower than this one so I’ve got to do a bit of painting above the backsplash.) Oh, and see that big hole under the sink?
That’s where we had a bit of an oopsie with a big drill bit (patching definitely required there too.) And a cabinet door randomly fell off at some point during this whole experiment…
…so that should probably go back on eventually too.
But the countertop is in! Yay! And it’s awesome. And I’m a very happy girl.
The moral of this tale? Unless you’re a skilled carpenter, have walls that are perfectly square, or are just really really lucky when it comes to these sorts of DIY things, hire someone for countertop replacement. Really. I didn’t at all enjoy this project, and I’m still not 100% thrilled with the end result. But it’s done. And hopefully prospective home buyers just won’t look too closely at our workmanship.
And they all lived happily ever after. The end. Ish. :)
Leave a comment
The kitchen floor fiasco finale (for real this time) (really!)
It’s done! Finished! Complete! Poof! Yep – the floor is done. Quarter round has been added. Seams have all been caulked. Everything has been painted. And a permanent smile is plastered on my face.
DONE.
Here’s the progression (for anyone who’s visual, like me.)
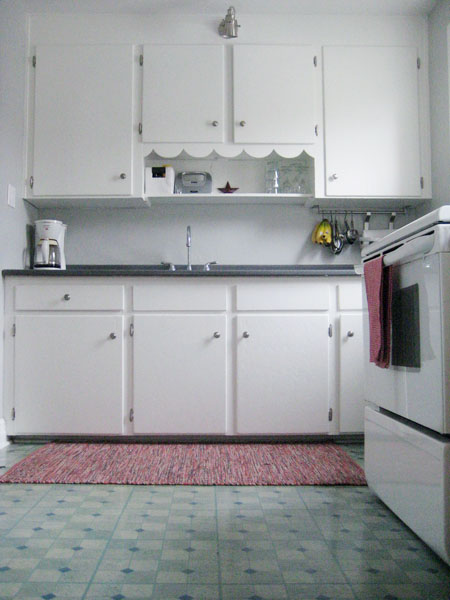
I started with this…
…which (thankfully!) turned into this…
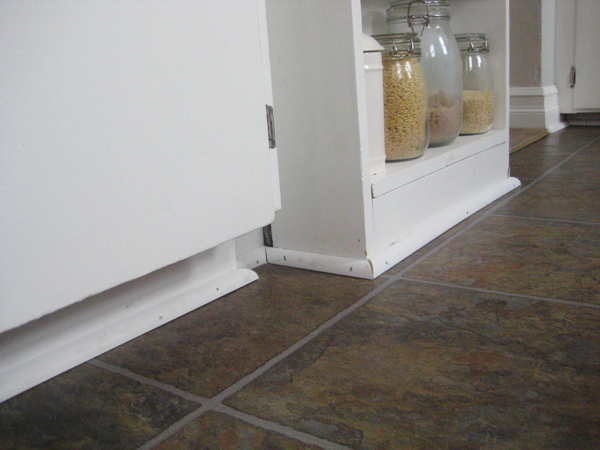
…Sweetie then added quarter round, which looked like this…
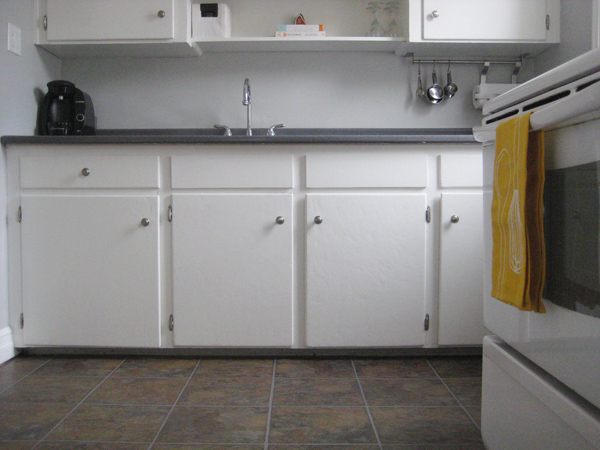
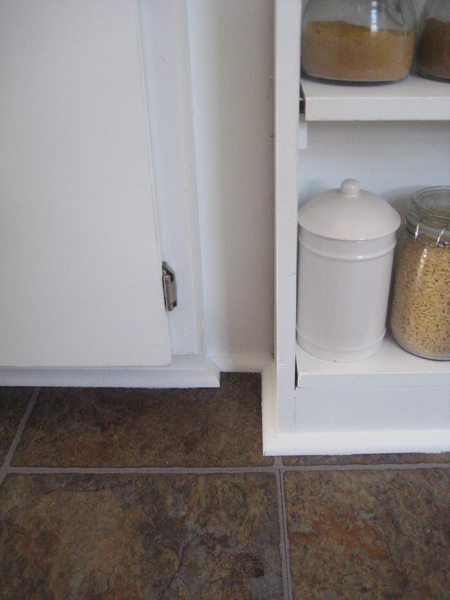
…then I caulked and painted everything, leaving a sparkly new (and finished) (and not blue) kitchen floor, that looks like this…
Am I happy much? YES. Have a already christened my new floor with a silly little happy dance? Of course. Does this occasion call for a big bottle of wine? Absolutely.
(Although pretty much any occasion is a good excuse for wine, if you ask me.)
One more thing done off our big ol’ to-do pre-listing list. And one major item completed from the list of things I’ve been meaning to do since we moved into this humble little abode 2.5 years ago.
Progress, how ever slow, is still progress. :)
Leave a comment


