Celebrating my favourite little human (who isn’t so little anymore)
My baby turned one a couple weeks ago.
Yep. It happened. Cue happy/wistful/omg-stop-growing-and-please-stay-little-forever-but-omg-look-at-all-the-amazing-things-you’re-learning-I’m-so-proud-of-you tears.
He’s not a little baby any more. He can almost walk, he can say Mama (or, rather, MomMom, which is so ridiculously cute and makes my heart happy every single time those two syllables escape his lovely little lips), he can play independently and clap and wave and do all sorts of things that seemed so impossible a year ago when he was this small squishy helpless little being who merely slept and ate and pooped (and filled my heart with so much love.)
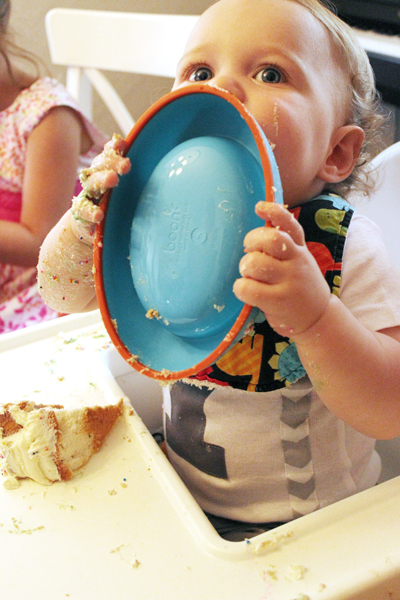
Sweetie and I celebrated his first birthday surrounded by close friends and family. There was cake and singing and so many amazing gifts and lots of happiness. Patrick was admittedly a bit overwhelmed by all the people (I may have a budding introvert on my hands… he might be just a tad like his mommy and daddy like that), but he had lots of smiles for people too (from his secure perch in my arms) and loved his birthday cake (and scattered it around for the kitties to sample too.)
It was such an absolutely lovely special wonderful day.
And where did I go to find touches to make his birthday extra special (and especially cute?) Etsy. Of course.
Patrick’s bowtie onesie came from an awesome vendor out of BC called Handsome Baby. And he did indeed look handsome!
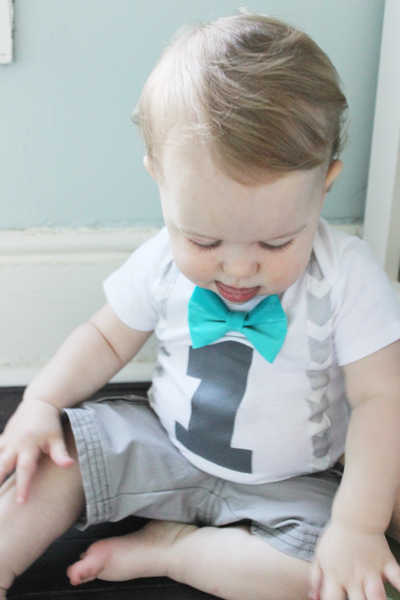
I have big plans for follow-up bowtie onesies. I foresee a Handsome Baby Christmas bowtie onesie in his future. And maybe an Easter one too. And a second birthday onesie for sure. And, honestly, he might need something with a green bowtie for St.Patrick’s Day (because of course he does.)
Yep. Me and Melissa over at Handsome Baby are going to become really good friends, I think. :)
And then there was Patrick’s first birthday board…
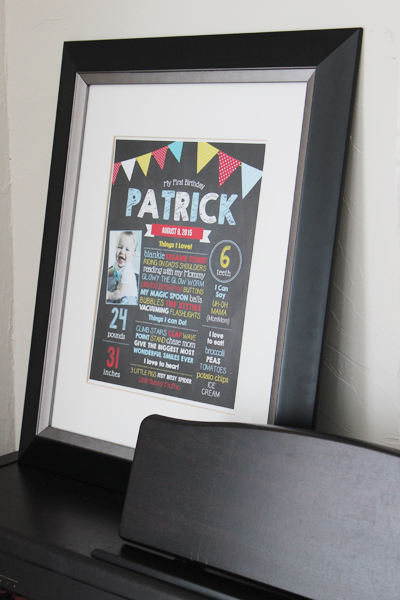
I agonized over birthday boards (there are, admittedly, a gazillion of them available on Etsy.) I fell in love with this one (put together by amazing Etsier MsFit Designs) because of the colours (which I then turned – loosely – into the colour theme for Patrick’s party – red, yellow, and pale blue.) (Or, I suppose, for those of you who support Captain Obvious, primary colours.)
And, with a few quickly fluffed tissue paper puffs here and there, that was about it for my party planning. This was not a Pinterest-worthy party, I’m afraid. I had big decorating plans that I’d planned to execute in the days leading up to Patrick’s party. Patrick, on the other hand, had big playing with mommy plans. The latter won out (and I wouldn’t change that for a thousand carefully made colour coordinated Pinterest-inspired birthday bunting flags.)
Nope. It was a simple party with just a few simple decorations and a whole lot of celebrating Patrick’s first year. And it was perfect for my little guy.
Although next year there might be bunting.
Because I do love me some bunting. :)
Leave a comment
)
I took a risk (surprised? Me too!)
Remember when I chatted a bit about painting my bedroom (here)? That seemingly simple project took weeks. WEEKS. Truthfully, months. Not because it was a particularly difficult project. In fact, due to the coved ceilings and (rather obnoxious and eventually to be removed) faux fireplace and the various doors/windows in the room, there wasn’t a great deal of actual wall-space to be painted. And, the delay wasn’t due to my (admittedly notorious) indecisiveness either. I boldly chose a paint colour lickity-split-ishly and rushed out to buy the paint before I could question my colour choice (since, once paint is purchased, you’re committed) (because if you buy paint from the good Mr Benjamin Moore like I do, painting is a bit of a financial commitment.)
Nope. The delay was caused by this…
Yup. An adorable squishy active smiley drooly nine month old.
Best reason for a delay ever. :)
However, the lack of painting progress seriously started to wear on me a bit. You see, that same ridiculously cute little man isn’t a particularly predictable napper. Sometimes he naps for a glorious two hours. Sometimes he barely shuts his lovely long-lashed eyelids and – poof! – he’s well-rested and ready to play again. This lack of predictability made it super difficult to get much done on the painting front. The days where I’d predict a lengthy nap were the days that I’d dip my virgin paintbrush into the paint and – bing! – he’d wake up. On the days that I assumed he’d take a quick little cat nap, he’d sleep for hours.
Yup. It’s hard to paint with a baby.
So, defeatedly, I called in the reinforcements: my parents. Mom (happily!) looked after Squishy while dad and I tackled the paint job (thanks mom and dad!) And I’m thrilled to have this project done. Thrilled! And I’m (almost) equally happy with the results!
Here’s what I started with…

And here’s the room lovelied-up with a wee bit of BM Copley Gray…
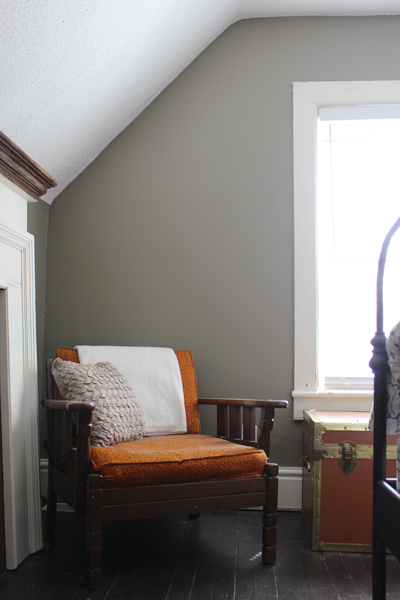
A full gallery of after shots is pending (there are curtains to go up and a mirror to hang and a few other to-do’s that I’d like to to-do before officially announcing the room DONE) but for now the painting part of this bedroom mini-reno project is complete (can I get a big ol’ yay for progress?) (Yup – YAY!)
What’s that you say? You thought I’d decided on Revere Pewter? I thought I had too. But it just seemed a little too predictable. I painted our bedroom at our last humble abode, our happy little 1940′s house, in Revere Pewter and I loved it, but I wanted to try something different. I’ve been eye-ing up Copley Gray for a while now, and I decided to take the slightly bolder paint-colour plunge.
So am I happy? Mostly. Admittedly, it’s greener on my walls than I’d hoped. At some points in the day, depending on the light, one might even call it (cringe…) sage. But at other times (and, really, most times) it’s a lovely gray/brown/green that is super cozy and warm and rustic (can a colour be rustic? If so, this one is definitely rustic.) And it’s far (far!) better than the poop-ish brown that adorned the walls when we bought this house, so I’m a happy girl for now.
And if, in a few years, I decide to repaint, hopefully Little Squish will be old enough to help? Or at least stay occupied for a bit while mommy paints?
Wishful thinking, I know. :)
Leave a comment
)
My triumphant (albeit slow moving) return to painting (aka the colour in our bedroom is driving me bonkers)
When we first came to look at this old mauve-coloured house nearly two years ago, I walked away thinking that the master bedroom was painted black. In fact, it’s not black. It’s brown. But it’s a dark-ish brown and the blinds were continually drawn in this room during showings (theory: the home owners were really vampires), and the colour appeared even darker and more awful than it actually is (although it is, indeed, pretty awful.)
For your viewing pleasure (or, perhaps, disbelief), here’s what our master bedroom looked like the first time we saw it…
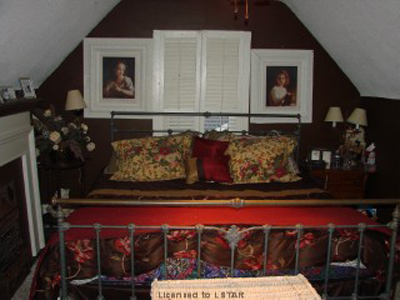
Ack, eh? Yes. Ack indeed. Flowers and nic-nacs and tiny lamps with tiny lampshades and stuff everywhere. Ev-ver-ry-where. Once again, I think it’s worth noting that we bought a house with rooms that looked like that. We’re very very very brave, my Sweetie and me.
(And yes, the two pictures hanging above the bed are indeed hung at different heights. Because lazer level be damned, willy-nilly picture hanging is how the previous house owners rolled. Those crazy loveable crooked-picture-hanging vampire-esque rebels.)
Of course, when Sweetie and I moved in, all that stuff (thankfully!) went away (and, miraculously, the room suddenly looked a gazillion times larger.) But that didn’t change the fact that the room is brown.
Icky brown, to be exact.
Here’s another look at that wall colour, minus all the clutter and with a wee bit of natural light…

Well hello there, ridiculously cute little man! :) Behind all that squishy adorableness are my ugly brown walls. A (temporarily) comfy black cat is also lounging somewhere back there. In fact, this picture was taken mere moments before I had to intervene in feline/infant interactions and declare “No, we don’t chew on the cat.” (A statement I never ever thought I’d have to make prior to having a baby.)
So what colour am I going with? Alas, I’m not being particularly original or daring with this project. Instead I’m falling back on the reliable, always lovely, Revere Pewter. I painted our bedroom at our beloved little 1940′s house this colour and I loved it.
It’s peaceful. It’s serene. It’s an actual colour and dark enough to be impactful, but not so much so that it’s overwhelming. Some have called Revere Pewter the perfect paint colour. I call it lovely and soft and well-suited for a bedroom. (And, particularly, for my bedroom.)
Now all I have to do is find the time to paint this aforementioned bedroom. With a small boy who doesn’t nap predictably (or, oftentimes, for very long), this might be a project best suited for the evening hours (once that same small sweet little man is fast asleep for the night.) Assuming, of course, that I can stay awake long enough to attack those ugly brown walls with my trusted paintbrush.
But, ahhhhh… Yup. It feels good to return to home renos, even if I now move a whole lot more slowly than before. Slow progress of any sort is still progress nonetheless. :)
Leave a comment
+return+to+painting+(aka+the+colour+in+our+bedroom+is+driving+me+bonkers))
A post about thank yous. And tardiness. (Tardy thank yous, to be exact.)
So I’m late for everything. Ev-ver-y-thing. I have really really good intentions and I strive (oh, how I strive!) to be punctual. It just never (ever) happens. I habitually arrive late for appointments. I’m almost always late for gatherings. My baby was born five days past his due date (although I might be able to blame Mother Nature for that one.) I did manage to make it to my own wedding on time, but only thanks to the army of amazing bridespeople I had behind me, gently pushing me to keep me on track.
Yup. I’m one of those people.
So it’s hardly surprising, I suppose, that I just finished up the thank you cards for my baby shower (um, the one I attended BEFORE Patrick was born) (in July) (early July…) Embarrassing? Yes. But, in all honesty, the past few months have absolutely flown by. FLOWN! And – poof! – suddenly it was December. And I suddenly realized that Christmas cards needed to go out. And it seemed in poor taste (actually, downright tacky) to send Christmas cards out to the same people who first deserved thank yous for their very generous and wonderfully thoughtful baby shower gifts.
Which, given the (embarrassingly long) time that had passed between the shower and the thank yous, makes me really thankful that I took the time (during the early days of my maternity leave, pre-baby) to carefully record what everyone had given me. Like this…
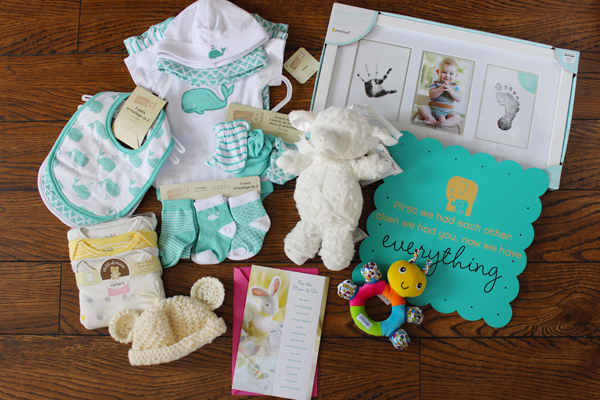
Yup. I took pictures of all the gifts I was given, along with the accompanying cards. Clever? I thought so! And, if not clever, practical at least, since five months out I would have never, in a gazillion years, remembered what gifts I was given and by whom (despite being unbelievably thankful for all of the super generous gifts I received.) (Mommy-brain is a bit of a bitch like that.)
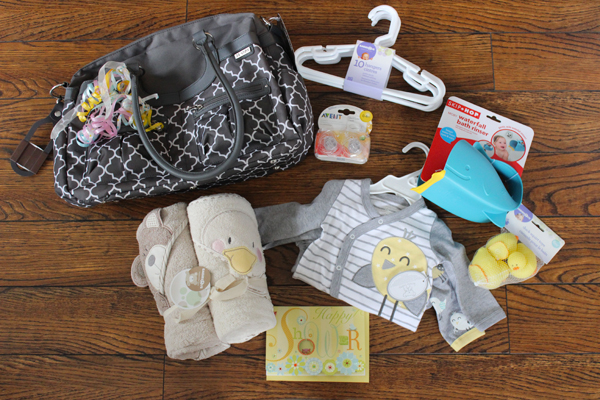
Plus I think it’s pretty neat to have pictures of all the gifts we were given. Yup. I’m all about preserving memories with my little guy. Every single memory. Every one. Even the tiniest. Mommy is a little OCD like that. (Although I prefer to call it “organized.”) Patrick is currently trying desperately to crawl, and I’m sure having the ability to run away from my camera makes mobility particularly appealing. (I have all of his crawling attempts videotaped, of course.)
So there. That’s my little piece of advice for any soon-to-be mommas out there who are headed to their baby showers shortly. Take pictures of your gifts. It’s actually quite a lovely keepsake! And, if you’re a bit tardy like me, it’ll be a huge help when you go to write your thank you cards. Several months later. :)
Leave a comment
)
Seeing red (and green and white) (and maybe a few sparkles too) (because everyone loves sparkles!)
So I recently saw this image from the lovely folk over at Ikea…
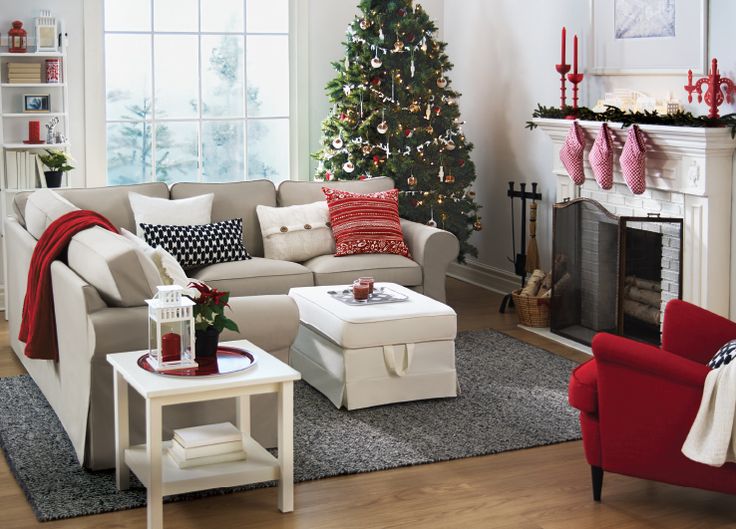
…and I got really (like, insanely) excited for Christmas. I don’t normally start planning for the holidays weeks in advance (I’m a bit of a last minute holiday girl, truth be told) but that red? Against that white? And all that merriness? Yep. It got to me.
So off we went (poor Patrick gets toted around a lot these days) (I think he’s developing an appreciation for shopping!) (or just a high tolerance for mommy) to HomeSense (of course.) And I wandered around the pillow aisle for far far too long. Did I emerge from all that soft and squishy loveliness triumphantly waving beautiful new red pillows in the air? No. But, as I’ve learned, that’s all part of the HomeSense experience. It’s the thrill of the hunt. It’s the glory of the chase. And I, like a throw pillow stalking tigress, will be returning shortly to HomeSense (with my cute little kitten in tow, of course) to continue chasing the ever elusive perfect festive red throw pillows.
BUT, in the meantime, I’ve found even more Christmas inspiration on Pinterest. Like this super festive living room…
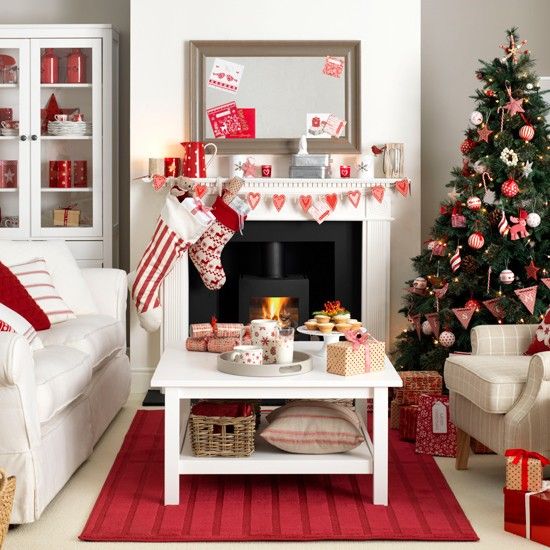
…from HouseToHome.
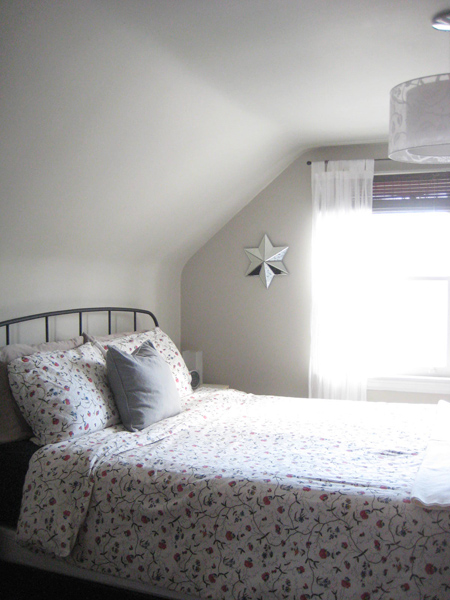
And this pretty room…

…from SandAndSisal (omg I want that chair!!!)
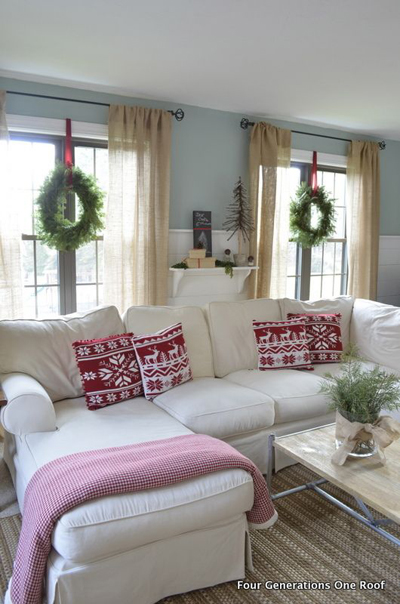
And this beautiful and comfy looking living room from Four Generations One Roof…
Yes, I’m completely obsessed with finding the perfect new red throw pillows now. And perhaps even a new red throw. Patrick just rolls his tiny little eyes over the whole thing. In his three long wise months, he’s become accustomed to mommy’s obsession with all things pretty.
But really, in this particular case, it’s all Ikea’s fault, you know. :)
Leave a comment
+(and+maybe+a+few+sparkles+too)+(because+everyone+loves+sparkles!))