Tying up loose ends (small projects for those of us with big bellies)
I’m tired. Yup, it finally happened. At 39 weeks (plus three days!) pregnant, I am ever nap-ready and having a hard time finding much motivation these days to do a whole lot of anything. Which, according to all sources (Sweetie, my friend Jess over at Little Townhome Love, my family, random strangers), is exactly how it should be: for the past few weeks they’ve collectively urged me to nap more and relax lots and just sit and enjoy the time that I have right now. For the record, I’m terrible at relaxing. My most common response to these subtle suggestions to sloth: but I have things to do.
But now I think I’m done.
Not because there aren’t a gazillion things I could be doing. (Dear neighbours: please please please disregard our front flowerbeds. I promise to be a far better gardener next summer.) (And dear dustbunnies: please stop multiplying so quickly in the corners.) But because I just don’t have the energy right now.
It’s a super hard thing for me to admit. I’m definitely feeling a little defeated.
That said, I had two joyously productive moments yesterday: I finished a couple of tiny little projects. And I’m quite proud.
First, I swapped out the front entryway doormat for a new one I picked up at HomeSense (oh how I love HomeSense!) a few days ago. I went from this stripey snore-fest…
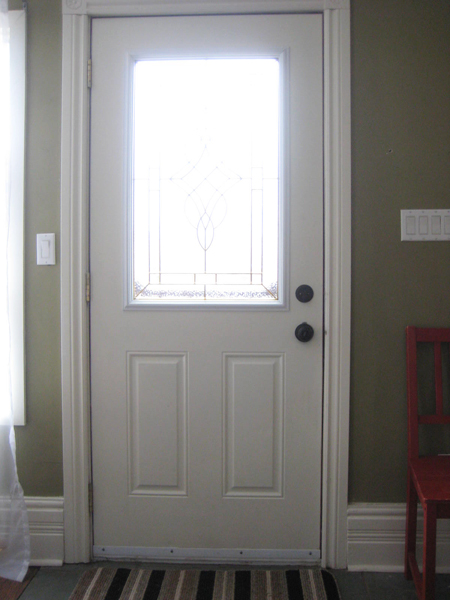
(Obviously file footage, since I’ve since painted those super ugly green walls!)
…to this…
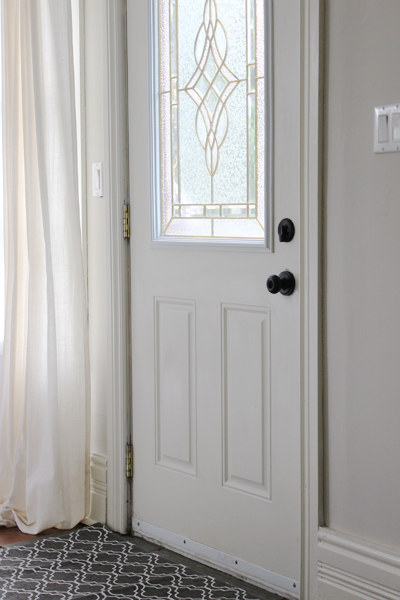
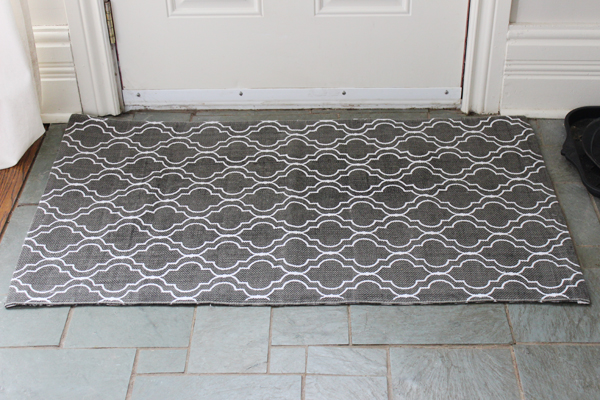
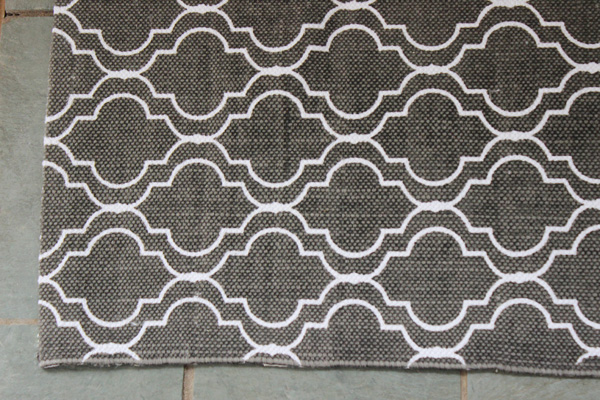

Admittedly, it’s not a massive change, but it makes me happy to think that any post-baby visitors will have a much nicer mat to land upon when they walk through my front door.
Project number two involved dressing a long-naked window in our living room. When we moved in, the previous owners had left some rather hideous and dirty-looking blinds on this window (which I promptly removed.) I was left with this…
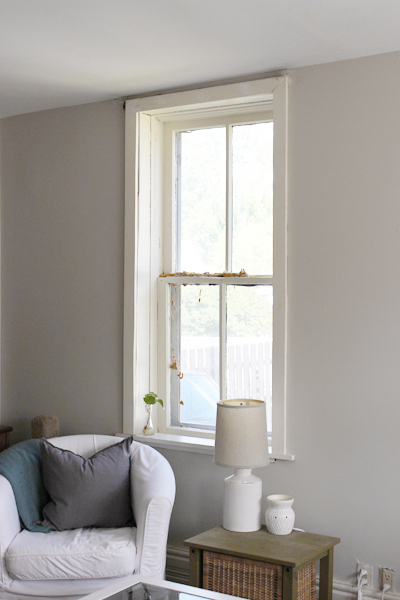
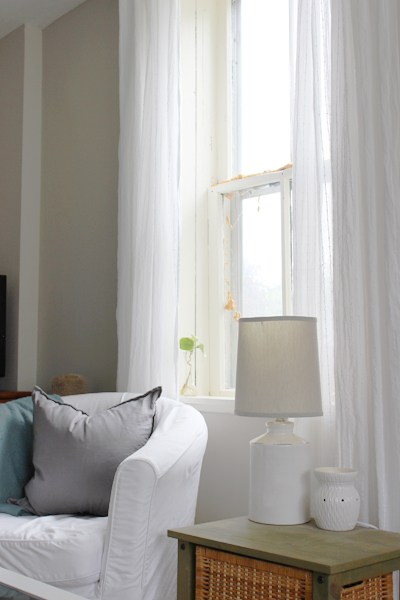
Unfortunately, and rather oddly, this window frame is positioned unusually high – it almost reaches the ceiling (I’m guessing that at some point someone dropped the ceiling in this room to run new, non-knob-and-tube wiring through the house since other ceilings on the main floor are a good foot taller.) As a result, I’ve hummed and hawed over what to do with this window for several months now. Yesterday, I had Sweetie hang a curtain rod right at ceiling height. And yesterday, I finally added curtains to this window.

And today, I am very happy with the result. The curtains (which are Ikea’s lovely Matilda panels, btw) don’t hide the ugliness of the window itself (see all that stuff on the window? Spray foam. Between the panes of glass. Yup, some not-so-bright but likely well-meaning previous home owner decided that this would be a good solution to winter draftiness.) (For the record, spray foam between the window panes is never ever a good – or, at least, nice looking – solution to draftiness.) But the curtains do make the window look better (which this soon-to-be momma is content with for now, until we find a way to disassemble the window and scrape out the offending foam.)
So there. Those are my two most recent tiny little accomplishments at the old mauve house. Significant? Not particularly. But I at least feel like I’m still making some progress, despite that my body is most definitely slowing down.
Now, if you’ll please excuse me for a moment (or two), this momma-to-be desperately needs a nap. :)
Leave a comment
A happy hardwood discovery (and a sad tale of forgotten hardware)
This post was supposed to be a rather celebratory “the evil white sheers are gone!” sort of post about my new drapes. My six (six!) packages of wonderful, lovely, much-adored, space-transforming new drapes, to be exact. However sometimes things don’t quite work out as planned. Like, for instance, when you buy all the hardware pieces needed to assemble a curtain rod for a big bay window, and you excitedly prepare to hang everything one sunny Sunday afternoon and then realize (dun dun dun) that you’ve forgotten a critical component way back at the store. Which, unfortunately, is 1.5 hours away.
Yep. That happened this weekend. I was so sad.
Luckily, I have another trip to Ikea planned for the not-so-distant future (since baby needs a dresser/change table for his or her little room, and handsome Hemnes seems to fit the bill) so we’ll pick up the remaining (and sadly missed) drapery hardware bits during that dresser-buying mission. In the meantime, however, my bay window looks rather naked. (Although the cats are pretty happy with the curtain-less and completely unobstructed view – cats don’t really understand, or care for, drapery.)
But the weekend wasn’t entirely filled with drapery doom and gloom! While staring (woefully) at my naked dining room windows, I noticed that a piece of our (quite shoddily installed) laminate flooring had at some point come loose.
So I gave it a wee wiggle. And it moved. And, in fact, it came completely out. And look (look!) what I found underneath…
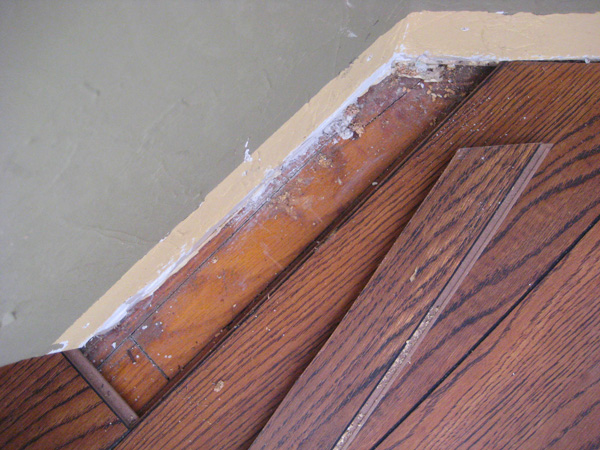
Yep. That, there, is hardwood. Not original-to-the-house beautiful 100 year old wide-plank-holy-awesomeness-pine-or-mahogany-or-something-equally-amazing hardwood, of course, but hardwood nonetheless.
I did a little happy dance. In front of my naked big bay windows. At the exact same moment that my neighbour walked by with his dog, of course. (I’m pretty sure the neighbours think we’re a bit odd.)
So our newest question? How far does the flooring extend? Is there hardwood under all of the laminate flooring in our living room/dining room? Or only under part? With the house being quite old (and without knowing what the original floorplan here looked like) the laminate could very well be hiding big ugly scars from walls that were removed and additions that were additioned over the years. Afterall, why else would you cover hardwood flooring with laminate? If it’s simply scratched up, hardwood can be refinished. And I’m not at all afraid of a few scratches. We’ve had this sort of narrow-plank hardwood flooring in both of our previous homes, and age-related scratches and dings just add a little character (if you ask me.) They scream “This house was well-loved in past years by families blessed with excited children and lively dinner parties.” If we reveal an expanse of hardwood underneath the laminate, regardless of the shape it’s in, I’ll be one happy girl.
Now, the hard part. Finding the courage to start ripping all of the existing flooring up. It’s one of those jobs that once started, can’t be stopped. It’s also one of those jobs that’ll require a really quickly executed Plan B if it turns out that the flooring underneath isn’t usable for some reason.
Maybe we’ll save that for another (much braver) day. In the meantime, I’m leaving that one small piece of laminate flooring pulled up as a reminder that something really amazing could be hiding underneath all the ugliness. Afterall, it was that same hope of hidden beauty that convinced us to buy our old mauve house in the first place. :)
Leave a comment
The kitchen floor fiasco finale (for real this time) (really!)
It’s done! Finished! Complete! Poof! Yep – the floor is done. Quarter round has been added. Seams have all been caulked. Everything has been painted. And a permanent smile is plastered on my face.
DONE.
Here’s the progression (for anyone who’s visual, like me.)
I started with this…
")
…which (thankfully!) turned into this…

…Sweetie then added quarter round, which looked like this…

…then I caulked and painted everything, leaving a sparkly new (and finished) (and not blue) kitchen floor, that looks like this…

Am I happy much? YES. Have a already christened my new floor with a silly little happy dance? Of course. Does this occasion call for a big bottle of wine? Absolutely.
(Although pretty much any occasion is a good excuse for wine, if you ask me.)
One more thing done off our big ol’ to-do pre-listing list. And one major item completed from the list of things I’ve been meaning to do since we moved into this humble little abode 2.5 years ago.
Progress, how ever slow, is still progress. :)
Leave a comment
My fantastic floating floor finale (well, almost…)
After months (well, YEARS, technically) of deliberation and debate and ongoing ponderings over the virtues of THIS floor versus THAT floor and what about THIS option over here and hey – why don’t we just cover the whole darn floor in PLYWOOD and just paint the stupid thing once and for all… I officially have a new kitchen floor.
And it’s not blue.
And there are no giant ugly gouges marring its loveliness.
And it looks clean and fresh and sparkly and new. :)
See?

Sigh. Yep. I’m a happy girl. Despite taking nearly THREE whole afternoons to lay (Dear Allure flooring folk: while I adore your product, it’s not necessarily as easily installed as you claim for those of us who are a tad OCD and really want all the seams to line up all nice and neat and such) and despite that it’s not my much adored hickory-look floor (oh, how I wanted that hickory-look floor!) it’s still way better than the 1980′s era flooring-monstrosity that hides underneath.
And, most importantly, it’s not blue.
Should we do a quick Before and After? Likely. Just because I’m super ridiculously proud like that.
The rather depressing BEFORE (with ugly 1980′s peel and stick blue tiles and a whole lot of ickiness)…
")
AFTER (pretty and clean and NOT BLUE)…


What’s that you say? Why yes – that IS a pretty new yellow tea towel (thank you for noticing!) I’m quite sure that Galen over at President’s Choice made that specifically for me because he knew yellow would look nice with my amazing new floor (and I think he was right.)

And see that bowl of lemons? Yep. That’s me practicing my fancy-pants house-staging tactics. Snazzy eh? Because I would never randomly just leave a bowl of fruit sitting out on my counter like that (since, well, I don’t eat much fruit, and it’d likely be all moldy and gross by the time I actually remembered it’s there. Which would make me sad.) (Unless we’re talking bananas here. Bananas are always a countertop fruit. But they don’t look nearly as pretty as lemons do in a bowl.)

So what’s missing? Quarter round. That goes on next (thanks to Sweetie’s stellar carpentry skills.) And then the floor drama will officially be over. Forever. Hooray! Tada!
Or at least until the next house. (Teehee.)
Leave a comment
Kitchen floor progress (yep, I finally took the kitchen floor plunge!)
Look!

That there is my new kitchen floor going down. Finally. Fiiiiiiiinally. (Insert big huge ridiculously silly happy dance HERE.) It’s amazing how the rush to get your house listed for spring (aka prime house-selling season) will suddenly move any much-deliberated but never-initiated projects into fast-forward mode. Yep – two and a half years of griping about our ugly kitchen floor (and much ongoing debate over what to replace it with) later, and we’re finally making ‘er pretty.
Progress rocks. :)
Sweetie removed all the quarter round for me last weekend…

And then I patched the icky holes in the old peel and stick tiles…

And then floor-laying officially began! I started yesterday with this…

Which then grew into this…

And then eventually became this (much later in the day and under ugly artificial light)…

I finally called it a night when I had enough flooring down that I could move the appliances back into place.
If you’ve been following my (ongoing) floor drama at all, you might notice that this isn’t the floor I originally wanted. Like, at all. I had big lovely hickory-look flooring plans. However all that quickly changed when I found a batch of flooring on clearance. Yep – I went cheap and cheerful on my resale-bound floor. Regularly $47 per box (with each box covering 24 square feet) I found four boxes of this particular floor (Allure’s Resilient Flooring in Patina) in Home Depot’s clearance pile for $30 each. And even after supplementing my clearance boxes with one additional box at full price (since four boxes would have given me exactly enough to do the floor without any extra for errors or weird cuts or things like that) the whole floor will cost about $170 in the end (plus a whole lot of elbow grease), which seems pretty darn reasonable, if you ask me! It’s not exactly what I wanted (and if we were planning to stay in this house, I would have committed to my beloved, but pricier, hickory-look floor) but for resale? It’ll do. :)
Assuming I give it a good solid effort, I’ll likely (hopefully!) have the rest of the floor down today. While it’s not quite as easy to put down as the good folk at Allure would like you to believe, it’s not particularly difficult either. It’s just time consuming. And a little finicky when it comes to making sure the seams are all tight.
Looking very (very!) forward to finally (finally!!!) checking “make kitchen floor look much much prettier and way less blue” off my to-do list. Next pre-listing project in line: countertops. :)
Leave a comment